
Making
Safe Drinking Water for Life!
Solar
Distillation
Using free sunlight, gravity, modern materials and imagination to transform undrinkable saltwater into fresh distilled drinking water! Punch Bowl Solar Distiller (saltwater) In March, (2012) I began testing a new saltwater distillation tool made mostly from clear polycarbonate plastic punch bowls. I obtained most of my materials from the local Party City. For now, I call it the Punch Bowl Solar Distiller and it's shown in Figure 1. It is made completely from off-the-shelf components with only a few minor modifications. This tool may be useful in arid areas with access to the sea and inland areas where the ground water has become salty or similarly polluted. This is my first practical solar distillation tool that is ready for field testing and evaluation by others. Figure 2 shows the Water Globe - what I imagine is the ideal solar distiller. The punch bowl solar distiller presented here is as close as I've arrived to my ideal. My plan is to produce a 2nd generation tool that will be the Water Globe, providing there is enough interest. How it Works The tool takes undrinkable saltwater and turns into fresh distilled drinking water by controlling natural evaporation and condensation. Evaporated saltwater is pure water, free of salt and other impurities. Water evaporates at all temperatures, above freezing. Heat will cause water to increase evaporation. Sunlight striking a black colored water vessel is a free way to heat water and increase evaporation. Having a clear enclosure allows sunlight to strike the water vessel and conserves heat (greenhouse effect) causing more evaporation. Using this tool with natural sunlight, saltwater is heated inside the tool. The pure water vapors condense on the (cooler) walls of the 10-quart bowls forming water droplets that are drawn by gravity to slide down to the drain and into the white bucket. Water can be collected and stored for many days in the white bucket. A final SODIS or chlorine treatment is necessary before drinking water that has been stored for many days. How it's Made Figure 3 shows all material components and tools used to make this solar distillation tool. All materials that contact water are food-safe. The tool is composed of rigid polycarbonate plastic including two 10-quart (16" dia) and one 5-quart (12" dia) clear bowls, one 5-quart (12" dia) black (polyethylene) bowl, one 2-gallon white bucket, one black (metal) enamel plate, four bottle caps, double back tape, and four small soft-grip binders clips to hold the bowls together. The only tools you need are a fireplace lighter and protective work glove. The retail cost is less than $20 in materials. One tool can be manually assembled in a few minutes! To Assemble this Tool, Follow these 7 Steps: 1. Find a secure low traffic area to place the tool where it can get at least 9-hours of direct sunlight. The water filled tool is very wind resistant, so don't worry about it blowing over. It is designed to be left outside and working 24-7. 2. Select one of the 10-quart bowls to be the bottom and one to be the top. Carefully burn a 1-inch diameter drain hole through the center of the bottom bowl using a fireplace lighter (use protective glove). Be certain to burn the hole from the inside out. 3. Place the bottom bowl on top of the white bucket. 4. Add small feet to raise the 5-quart clear bowl. I use bottle caps attached with double back tape for feet. Other kinds of feet may be improvised. 5. Place the plate at the bottom of the black bowl. The two components work as a heat sink. Then place the black bowl inside the clear (rigid) 5-quart bowl. Tilt the rim of the black bowl forward about 15° in the general direction of the sun. This will stabilize the two bowls and optimize exposure to sunlight. 6. Fill the black bowl with saltwater and carefully place the assembly into the center of the tool. Again, only the black bowl (and plate) hold untreated saltwater. 7. Place the top 10-quart bowl over the bottom and secure the two bowls with evenly spaced small soft-grip binders clips. Every 3-4 days open the tool and check the saltwater level. Carefully add more saltwater to keep the black bowl nearly filled. At the end of a week (or two), collect the fresh distilled water from the white bucket. Again, a final SODIS or chlorine treatment is necessary before drinking water that has been stored for many days. The Results Tests have been conducted under mostly sunny skies with temperatures ranging 75 ° - 82° F (24° - 28° C). So far, the tool can produce 1-cup (250 ml) in a 24-hour period. As is, this tool will produce about a gallon of fresh distilled water from saltwater in about 2-weeks. Hence, to be effective, many of these little distillation tools are required. Think of using these tools like a farmer who plants his seeds, waits until harvest time, and reaps his reward. These little tools are the seeds! Also, I envision something like this tool as the basis for a larger distillation assembly composed of multiple 'punch bowls' that feed distilled (fresh) water into a central storage vessel. Finally, I am considering using larger clear plastic globes to make larger tools based on my punch bowl design. I have located suppliers to accomplish this. However, some of these larger globes are priced over $100. Hence, cost may be an obstacle. Again, Figure 2 shows the Water Globe that I imagine is the ideal solar distiller. A larger more perfect globe will allow greater evaporation and improved accumulation and flow of condensed water droplets. You can follow this Solar Distillation Tool topic on the Water|Sanitation|Hygiene forum. |
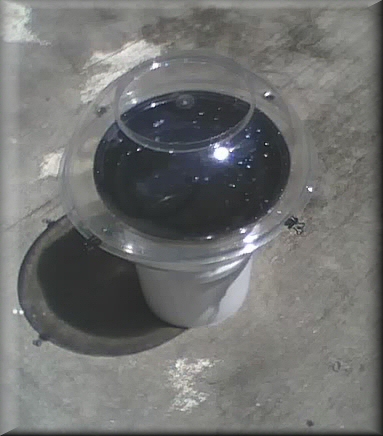 Figure 1. Punch Bowl Solar Distiller. 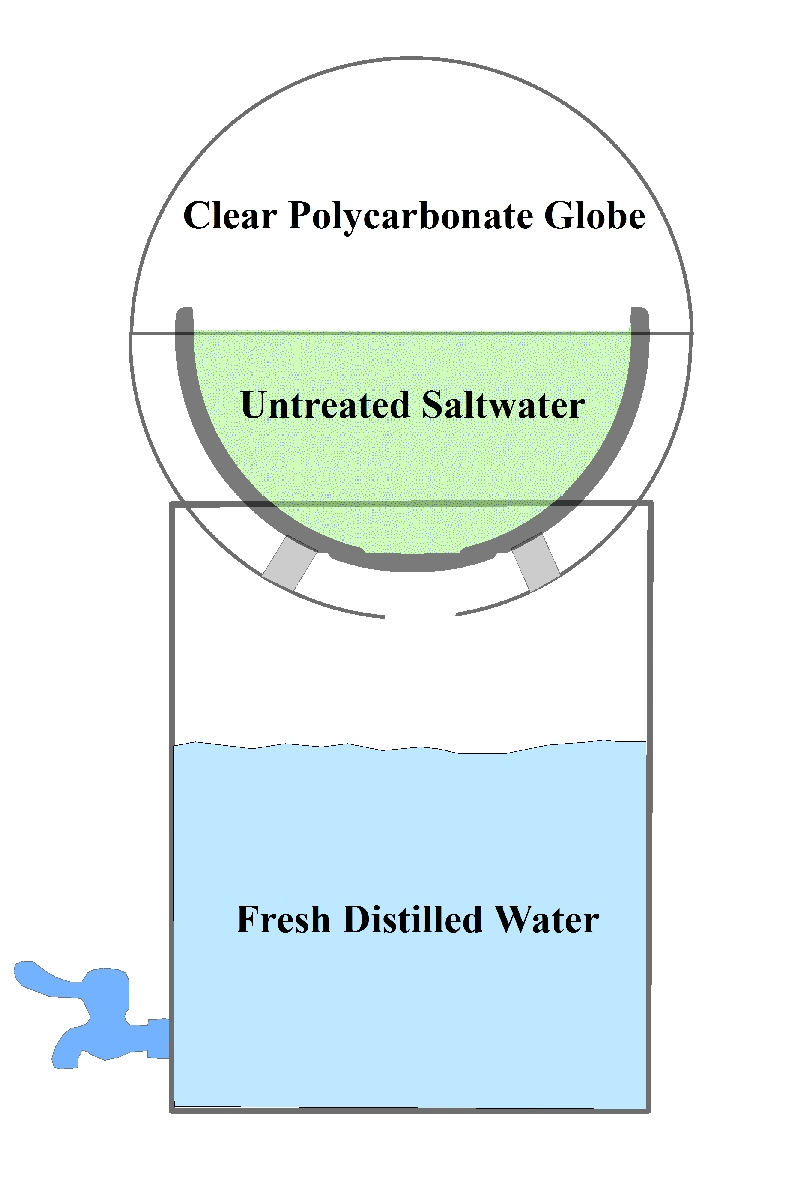 Figure 2. Illustration of the Water Globe - the ideal solar distillation tool. . 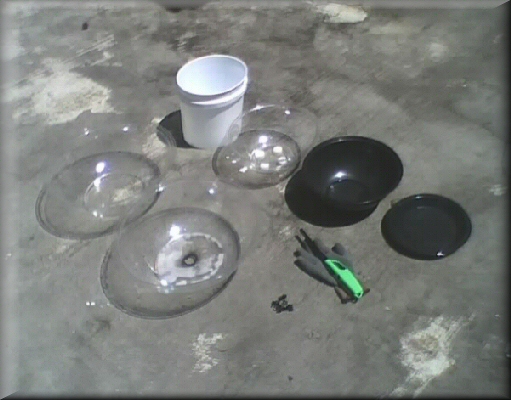 Figure 3. Components and tools used to make the solar distiller. 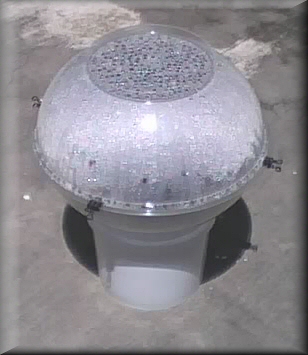 Only mad dogs and solar distillers go out in the midday sun! |

